Showing posts with label grandma. Show all posts

Saturday, April 16, 2011

Born and Bred

I wasn't bred to make bread.

Well, I take that back. While baking bread wasn't part of my family's weekly (or even monthly) repertoire—besides the couple years my mom used the revolutionary bread machine—I have vivid memories of three varieties that appeared consistently year after year. I'll call them the Bread Holy Trinity: They were Irish soda bread, Polish sweet bread and Slovenian nut bread (potica).

I've already told the story about soda bread, which my grandmother learned from an Irish friend and made every St. Patrick's day. The same grandmother (Grandma Perron) also baked Polish sweet bread—a recipe I'm sharing in this post—annually for Easter. My dad's mom, Grandma Mary, mastered potica; we'd look forward to it every Christmas.

Our family can eat bread like the last-standing bakery is closing up shop. Yet, when it comes to making bread, it's definitely a special occasion process.

Every Easter, my grandma would make sweet bread. She learned it from her mother. Three generations later, my mom is still using the original pans from her grandmother (my great-grandmother). Last weekend, I was lucky enough to have a private tutorial by my mom who was featured in Cleveland's Plain Dealer in 2008 for the recipe.

Grandma's Polish Sweet Bread

Yield: 3 to 4 loaves

For the dough:
3 cups of 2-percent or whole milk
1 cup plus 1/2 teaspoon sugar
3/4 cup margarine (yes, my great-grandmother used margarine)
2 packages (1/4 ounce each) active dry yeast (not rapid rise) or 4 1/2 teaspoons active dry yeast from jar
1/4 cup lukewarm water (110-115 degrees)
6 large eggs, room temperature
1 teaspoon salt
1 teaspoon vanilla
8 cups AP flour
1/2 teaspoon nutmeg
2 cups yellow raisins, soaked for 10 minutes in warm water and drained

For the topping:
1/2 cup margarine, melted and cooled
2 tablespoons sugar
1 tablespoon cinnamon
2 Granny Smith apples, peeled and sliced into 1/2-inch slices

1. Add one cup sugar and 3/4 cup margarine to the milk in the saucepan, then scald over low heat. Remove from heat and cool completely.

2. Proof the yeast in lukewarm water, adding 1/2 teaspoon sugar and quickly mixing. Set aside for 5 minutes until the yeast bubbles.

3. Beat eggs, salt and vanilla. In a large, separate bowl, sift together flour and nutmeg.

4. Form a well in the middle of the flour mixture. Add a small amount of the cooled scalded milk mixture along with a bit of the egg mixture and all of the proofed yeast; mix to combine. Add the remaining milk and egg mixtures and blend well. Beat with wooden spoon until the dough becomes smooth and glossy and leaves the sides of the bowl, about 15 to 20 minutes. (This can also be done with a stand mixer, which I used. It will take about half the amount of time.) Thoroughly mix in raisins. And don't worry—dough will be sticky!

5. If using a stand mixer, transfer the dough to a large bowl. Cover the bowl with wax paper and then a towel and place in a warm spot. Let rise until doubled in size.
6. After the first rise, punch down dough with a spoon to release air. Grease 3-4 baking pans and divide the dough among them. (The dough should come halfway up the sides.) Cover with wax paper and let it double in size again.

7. Meanwhile, preheat the oven to 350 degrees. When the dough has risen, make the topping. Melt the remaining 1/2 cup margarine and spoon over each loaf. Combine the sugar and cinnamon and divide it in half. Sprinkle the loaves with half the mixture. Lightly press apple slices, cored edges down, on the top of each loaf. Sprinkle the remaining half of the cinnamon sugar on top.
8. Bake bread 20 minutes, then turn down the temperature to 325 degrees and bake an additional 30 minutes or until each loaf tests done. Remove from oven and let cool in pans 5 minutes, then turn them onto wire racks to completely cool. Store in resealable bags.

I look forward to trying the recipe on my own next Easter—or maybe even prior. My goal this year is to dive into bread making a bit more. Polish sweet bread would be good practice.
After all, I just ate the last bit of the loaf for breakfast. Tip: French toast is better with grandma's bread.
Monday, April 11, 2011

Family Food

To say that I eat well when I'm with my family would be an understatement.

For the Knifics, eating is something of a sport. We constantly talk about food, have opinions regarding what we've consumed, compare dishes, plan meals and rank restaurants. When I'm visiting my parents in Ohio, our time together typically centers around food. Whether it's learning a family recipe from my mom or enjoying a meal by chef Michael Symon, our preferred activity is pretty obvious.

I arrived back in New York earlier today after a weekend with my mom, dad and brother (sadly, sans Ryan). I booked a last-minute flight to spend time with my mom, who recently underwent surgery. My hope was to cook a couple dinners for her so she could relax and get back to her full strength.

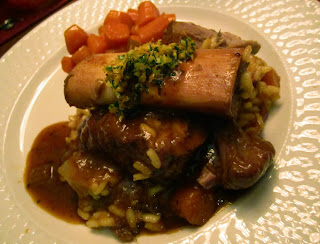
Although we didn't head to any restaurants, we definitely did our fair share of eating. With the help of my brother, Christopher, I spent the weekend cooking up a storm. From osso buco with saffron risotto (one of my mom's favorites) to coffee-crusted pork tenderloin with bourbon cream sauce and polenta, we ate like it was going out of style. Christopher even made his grilled artichokes, which is one of my personal favorites. And my dad, the official family mixologist, poured a few cocktails and selected some wines to pair perfectly with the food.
Being who she is, my mom still managed to find her way into the kitchen. ("Mom, please rest! It's good for you!") She showed me how to make her mom's Polish Sweet Bread, which I plan to dedicate an entire post to soon.

Even with my mom not feeling up to par, we unsurprisingly found a way to make food the main event. My mom, of course, was the star guest.

Friday, April 1, 2011

Steak, Rattle & Roll

I remember the way my parents' house used to smell when steak rolls were for dinner. It was a distinct mix of beef, bacon and onions—an aroma I haven't experienced for quite some time.

Recently, a friend mentioned that he made braciole. My mind immediately went to the steak rolls, and I couldn't get them out of my head. I craved the smell—and of course the taste. It was time to leaf through my trusty recipe box and find an old favorite.

I give my Grandma Perron steak roll credit; I think she would be proud of my end result. Thanks to her, my mom learned the recipe. Aside from a couple changes—mostly due to what I had in my apartment—I stayed very true to the original recipe.
Grandma Perron's Steak Rolls

1 1/4 pound thinly sliced top round (or sirloin tip) steak, pounded to 1/4-inch thickness
1 medium red onion, thinly sliced and divided
4 slices peppered bacon
Salt and pepper
AP flour, for dredging
1 tablespoon butter
1 tablespoon olive oil
2 cups beef broth
1/2 cup dry red wine
4 ounces mushrooms, sliced
2 thyme sprigs

1. Preheat oven to 350 degrees.

2. Cut pounded steak into equal-size portions (I cut four pieces into thirds for 12 portions). Slice each piece of bacon into thirds.

3. On each piece of steak, place a strip of bacon and a few red onions. Roll and secure with a toothpick; in some cases, more than one toothpick might be necessary. Season the rolls with salt and pepper, then dredge in flour.

4. Heat a saute pan on medium-high; add butter and oil. Working in batches, add rolls and sear on all sides. Remove from pan and place in an 8 by 8-inch baking dish. Deglaze the pan with wine and reduce by half. Add beef broth, remaining onion, mushrooms and thyme and bring to a boil. Pour sauce over the browned rolls.
5. Bake rolls 45 minutes to 1 hour or until tender.

6. Remove rolls with tongs onto a plate and cover. Pour liquid into a sauce pan and reduce until thickened, about 20 minutes. Season with salt and pepper. Serve rolls with sauce—and a mound of mashed potatoes.
Growing up, the recipe was a favorite of my meat-eating family. After seeing my carnivorous husband's reaction, I'm pretty sure this will be a favorite of his, too.

Thursday, March 17, 2011

Irish Blessing

My (quarter-percent) Irish eyes are smiling.

Every St. Patrick's Day that I can remember, my mom has baked Irish soda bread. One corner of the kitchen counter is dedicated to a pile of loaves. My mom keeps two and distributes the rest to family and friends.

The recipe she uses is from her mother, my grandma Perron, from whom she learned the tradition; my grandma acquired the recipe from her Irish friend. I imagine there are thousands of variations of Irish soda bread, but this is the one that I compare to every other. If it doesn't taste like the one I grew up with, it's simply not right.

My grandma passed away more than a decade ago, but my mom has kept the Irish soda bread tradition alive. She reserves a loaf especially for my grandpa, who has always enjoyed being on the receiving end of the bread baking ritual.

Living more than a quick drive away from my parents since college began, I haven't eaten Irish soda bread more than a couple times in the last 10 years. I miss it. I decided this was the year I was going to try it on my own. My mom walked me through the recipe over the phone, and I was able to produce two nice loaves.

Grandma Perron's Irish Soda Bread

4 cups AP flour
1 teaspoon baking soda
1 teaspoon salt
1 tablespoon caraway seeds
1/2 cup sugar
1/4 pound unsalted butter (1 stick), room temperature
1 cup raisins, soaked in hot water for 10 minutes and drained
1 1/3 cups buttermilk
Cornmeal, as needed

1. Preheat oven to 350 degrees. Grease a parchment-lined baking sheet with cooking spray (or—I haven't done it this way but I imagine it would work nicely—a 10-inch cast iron skillet).

2. Sift flour, baking soda, salt and sugar. Using a stand mixer fitted with a dough hook, place mixture in the bowl and crumble in butter; combine until it looks like coarse bread crumbs. Mix in drained raisins and caraway seeds. Add buttermilk and mix until the dough barely comes together (it will be sticky and look shaggy). If over-kneaded, the bread will be tough.

3. Lightly sprinkle the baking sheet or skillet with cornmeal. If desired (the method I chose), divide dough in half, mold into 5-inch rounds and place on separate baking sheets. Score dough with an "X" to prevent cracking.

4. Bake 1 hour for one loaf, 40-45 minutes for two loaves, or until cake tester inserted in the middle of either comes out clean. Cool on a wire rack. Serve breakfast, lunch and dinner with Irish butter (or whatever butter you have). Be sure to store at room temperature in a resealable plastic bag because it will dry out.

Of course, my mom has the bread down to a science. She texted me a picture of her perfectly brown loaves and I became instantly jealous. I imagine it will take practice—not to mention my Manhattan oven isn't good for much.

I feel the luck of the Irish that I'm part Irish.

Wednesday, November 10, 2010

Nuts for Nut Rolls

Days 77 and 78

Ahh, the comforts of home.

The third and final buffet group presented its week's worth of hard work today. The theme was Croatia, and I was a happy camper: Several of the dishes reminded me of food I grew up eating. (I'm half Slovenian—the country of Slovenia is adjacent to Croatia and has very similar food—and the rest of my ethnic background is Italian, Irish and Polish.)

One dish in particular—potica—was especially meaningful. The first bite of the nut roll brought me back to Christmas in Cleveland when my Grandma Mary was alive. She would make it every year; if there was any left, we'd take it home and dunk it in coffee in the morning. The potica made for the buffet was awesome. Thank you, mom, for sending the recipe, and thank you, chef and a good friend (you know who you are) for trying your hands at a family favorite. Grandma would be proud.

I was obviously thrilled about the potica, but I was also psyched to work with rabbits. The butchering comprised the entire day. The first half, I deboned them and used Activa—also known as transglutaminase "meat glue"—to roll the rabbit into a sausage-like shape. During the second half of the day, I broke the rabbits into several pieces, including front and rear legs, tenderloins and the smallest rack of ribs you've ever seen. Butchering took up most of the day yesterday as well; I removed the legs and breasts from ducks.

I really racked up some butchering practice this week.