Thursday, June 30, 2011

Grain of Knowledge

The results are in.

Last week, I had the honor of traveling to Wichita, Kan., to judge the 2011 Festival of Breads. The panel (which comprised me, a bread instructor and a bakery owner) declared Gale Collier of Redmond, Ore., the winner. Her recipe for Quick Raisin Granola Breakfast Rolls won our vote for overall appearance, ease of preparation, originality and, of course, taste.
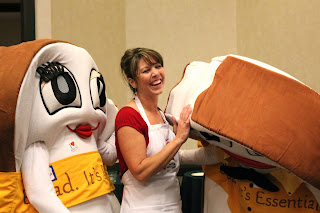
That's not to say the other eight finalists—narrowed down from a pool of 500-plus amateur bakers' entries—didn't have amazing recipes. Really, it came down to the performance of the baker that day. Anyone could have come out ahead.
Sponsored by the Kansas Wheat Commission, King Arthur Flour and Fleischmann's Yeast, the competition was part of a day-long celebration of bread. The festival featured a booth selling fresh-baked goods; proceeds went to Share Our Strength's Great American Bake Sale to help end childhood hunger.
Prior to the competition, I was able to tour a working wheat farm, grain elevator and flour mill to see how the product finds its way to my kitchen table. The Midwesterner in me loved every minute of it—especially the combine ride! I'm always fascinated by the origin of food; I truly believe it makes me grow as a cook.
One of my goals this year is to expand my bread-making knowledge. Thank you, Wichita, for helping me get a few giant steps closer.

Monday, June 20, 2011

Grate Escape

There are a million things I love about living in New York—and there are a handful of things that drive me crazy.

Living without a grill is one of the latter.

Unfortunately, I'm not part of the lucky few that has a shared courtyard or—better yet—an actual yard. Instead, I rely on a grill pan that isn't even close to delivering the flavor of seasoned grates. Usually I hit up restaurants for my barbecue fix.

This weekend, though, things were different. Ryan and I headed to Nashville, Tenn., to visit his sister and her husband, who are fortunate grill owners. I was more than happy to replace an evening of restaurant-hopping with a cookout. We made Whole Foods our destination and picked up some supplies.

I settled on a bourbon-molasses sauce and built a menu around it. Judging from the near-empty drumstick platter and the crimson crime scene-esque sauce streaks on everyone's faces, I'd say I made the right decision.
Bourbon-Molasses Chicken Drumsticks (Courtesy of Bon Appetit via Epicurious.com)
Yield: 4 servings

Sauce
1/4 cup (1/2 stick) butter
1 cup minced onion
1 cup ketchup
1/4 cup molasses
2 tablespoons packed brown sugar
1 1/2 tablespoons Worcestershire sauce
2 teaspoons yellow mustard (I used Dijon)
3/4 teaspoon ground black pepper, divided
1/4 teaspoon chili powder
1/4 cup bourbon
1 1/2 teaspoons coarse kosher salt
12 chicken drumsticks

1. Melt butter in a large saucepan over medium heat. Add onion; saute until soft, about 6 minutes. Add next five ingredients as well as 1/4 teaspoon pepper and chili powder. Reduce heat to medium-low and simmer until sauce thickens, about 15 minutes. Stir in bourbon; cook until heated through, about 3 minutes. Season with salt. (This can be made one day ahead. Cover and chill in refrigerator.)

2. Mix salt and remaining 1/2 teaspoon pepper in bowl. Loosen skin on drumsticks. Rub salt and pepper under skin without tearing it. Cover; let stand at room temperature about 30 minutes.

3. Heat grill on medium. Grill drumsticks until skin is crisp and juices run clear, turning to cook on all sides, about 25 minutes. Transfer 1/2 cup sauce to a small bowl; reserve. Brush drumsticks with remaining sauce and cook until glaze forms, about 3 minutes longer. Transfer drumsticks to platter and serve with reserved sauce.
I served the chicken with baked sharp cheddar grits, a fresh pea and lettuce saute, and (non-homemade) sea salt caramel gelato. Winner, winner, chicken dinner!

Tuesday, June 14, 2011

Cheesy Does It

Birthdays in our home are more like birthweeks.

It was certainly the case this year for Ryan's annual celebration. He spent a good five days eating some of his favorite foods, from burgers to tacos. Some meals were eaten in restaurants; others were enjoyed at home.

I wrapped up Ryan's birthday week cooking an Indian buffet. Typically, I leave this cuisine—which happens to be one of his favorites—up to our favorite Indian restaurants in Jackson Heights, Queens, and the East Village. This time, I gave it a go. I spent all day making cucumber-scallion raita, dal, bandh gobhi ki sabzi (buttered cabbage), and finally, sag and paneer. The latter is what gave me inspiration in the first place.
Paneer, a fresh Asian cheese, is not widely available in supermarkets. It is, however, easy to make. So that's what I did—and the Indian buffet was born.

Paneer (Courtesy of Bal Arneson via The Cooking Channel)

4 cups whole milk
1/4 cup vinegar

1. Bring the milk to a boil in a large pot. Add the vinegar and stir until the mixture separates into solids and liquids. Drain the mixture through a cheesecloth set in a large mesh sieve over a bowl. Wrap the ends of the cheesecloth around the curd and put a heavy weight on it such as a cookie jar (or, in my case, a popcorn container). Place the mixture in the refrigerator.
2. Let the liquid completely drain for at least one hour or overnight for a firmer cheese. (If you're going to pan-fry it, I would suggest overnight.)
Don't be afraid to give this one a shot. And if you're not a fan of Indian food, don't fret—this cheese would be just at home on a fresh salad (be sure to sprinkle it generously with salt to bring out the flavor).

Now just say cheese!

Wednesday, June 8, 2011

Flour Power

What kid doesn't love PB&J?

I'd been waiting for the perfect moment to break out the peanut flour I bought a few weeks ago at a conference surrounding the legume. It was the first time I'd seen it, and I couldn't stop thinking about the ways in which I would use it.
When Ryan and I were invited to a barbecue last weekend, I immediately went into planning mode (per usual). Surely, there would be a ton of little ones attending. What could I make that children would love? Then it came to me: peanut butter and jelly cookies.

I adapted a recipe from a peanut flour website. Because it's pastry—and it was the first time using the product—I wanted to make sure my ratios were correct. You see, you can't use peanut flour just like grain flours. Peanut flour is made by grinding roasted peanuts and pressing out the oil. It's still high in protein (around 30 grams per cup!), but relatively low-fat in fat.

The cookies were a hit. The three dozen I made (minus the four Ryan and I ate before the barbecue) were gone in a flash. However, the kids weren't the cookie monsters like I predicted—turns out the adults were the ones sneaking the sweets this time.
Peanut Butter and Jelly Cookies (adapted from Nabila Covington via www.proteinplusflour.com)
Yield: about 3 dozen

2 sticks butter, softened
1 cup packed brown sugar (I used dark brown)
3 large eggs, yolks and whites separated
1 teaspoon vanilla
1 1/2 cups AP flour
1 cup peanut flour
1/4 teaspoon salt
2 cups chopped peanuts
4 tablespoons or more of jam or jelly (I used strawberry jam)

1. Heat oven to 375 degrees.

2. In a stand mixer fitted with the whisk attachment, beat butter and sugar until creamy. Beat in yolks one at a time, then vanilla.

3. In a separate small bowl, lightly beat egg whites and set aside.

4. In another bowl, stir together AP flour, peanut flour and salt. Gradually add to the butter mixture, blending thoroughly. With your hands, roll dough into balls about 1 inch in diameter. Dip each ball in the egg whites and then roll in chopped peanuts. Place on a parchment-lined baking sheet, spacing the cookies about 1 inch apart. With your thumb, make an indentation in the center of each ball; neatly fill with about 1/4 to 1/2 teaspoon jam.

5. Bake for 12 minutes or until light brown. Cool on baking sheet for a couple minutes, then transfer to a cooling rack. Store in an airtight container.

My mind continues to contemplate the uses of peanut flour. There's a bag of carrots in the fridge, so I'm thinking peanut-carrot muffins would be a good option. I could also slice up some chicken breasts and dredge them in chili-laced flour for an Indonesian-influenced dinner. Or make both.

Just call me nuts.

Wednesday, June 1, 2011

Pizza, pizza!

I love pizza like the next guy.

Here's the thing, though: Going out for a pie is one of my favorite activities, but sometimes it's nice to just make it at home. But there's a slight problem with this in that I don't know much about pizza dough making.

Of course there's always the Buy-your-dough-from-a-local-pizzeria solution. I recently did this, topping the pie with roasted butternut squash, caramelized onion, spicy sausage and smoked mozzarella. It was delicious, but it felt like I was cheating.
Until a few months ago, I'd baked homemade pizza in an old 9 x 13 sheet pan. A co-worker kindly gave me a pizza stone and it motivated me to try my hand at some dough. It turned out well, but it still wasn't Luzzo's, Motorino or Michael Angelo's quality.
Obviously, I'm not surprised my dough didn't taste the same. First off, I'm certain these recipes have been passed down forever. Plus, I just don't have the right equipment—a pizza stone, as great as it is, cannot do what a professional oven can.

Either way, I'm now on a mission to find the most amazing pizza dough recipe. Have one you'd like to share? Please send it my way. Keep in mind that I'll be using a pizza stone (which reminds me that I need to pick up a peel—a vital tool I'm missing) and that I have a tiny, conventional oven.
In return, I'd be more than happy to provide some of my topping ideas. Swiss chard, bacon and smoked gouda pizza anyone?